In this article we go over how to configure MemberMouse WooCommerce Plus.
The Settings Tab
After you activate the plugin’s license, all the settings will automatically update in the Settings tab.
Go over them and change them according to your needs.
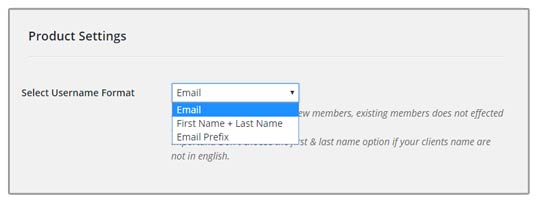
Product Settings:
Select Username Format – As the username is auto-generated, you can choose the username format to be the complete email, the email prefix or a combination of the first and last name.

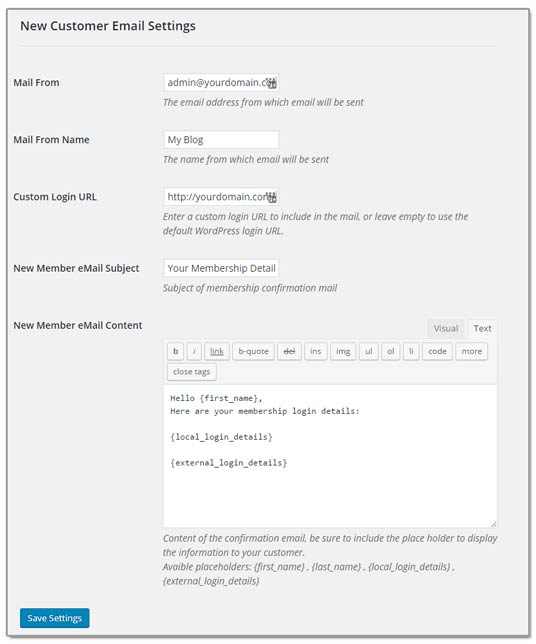
New Customer Email Settings:
- Mail From – The email address from which emails will be sent
Mail From Name – The name from which emails will be sent - Custom Login URL – The custom URL that will appear in the email sent
- New Member eMail Subject – The subject of the membership confirmation email
- New Member eMail Content – The content of the confirmation email

Adding Membership Products
Note: Before you can start creating new membership products, make sure you have setup the membership levels and bundles inside MemberMouse settings.
To add a new membership product follow these steps:
- Go to the Products menu
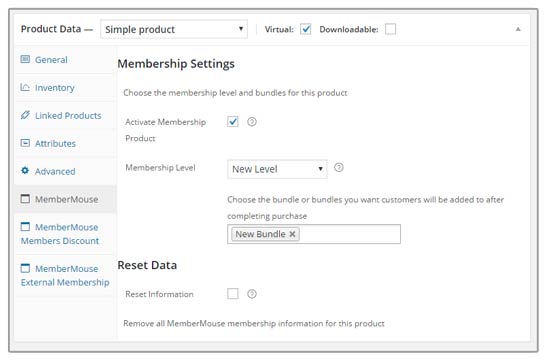
- Scroll down to the Product Data Meta box
- Click on the MemberMouse tab Define your membership settings, including these fields:
» Activate Membership Product
» Membership Level
» Bundle/s (if relevant) - Publish your product
Here is a screenshot of the integration settings:

That’s it! Member and WooCommerce are now fully integrated.
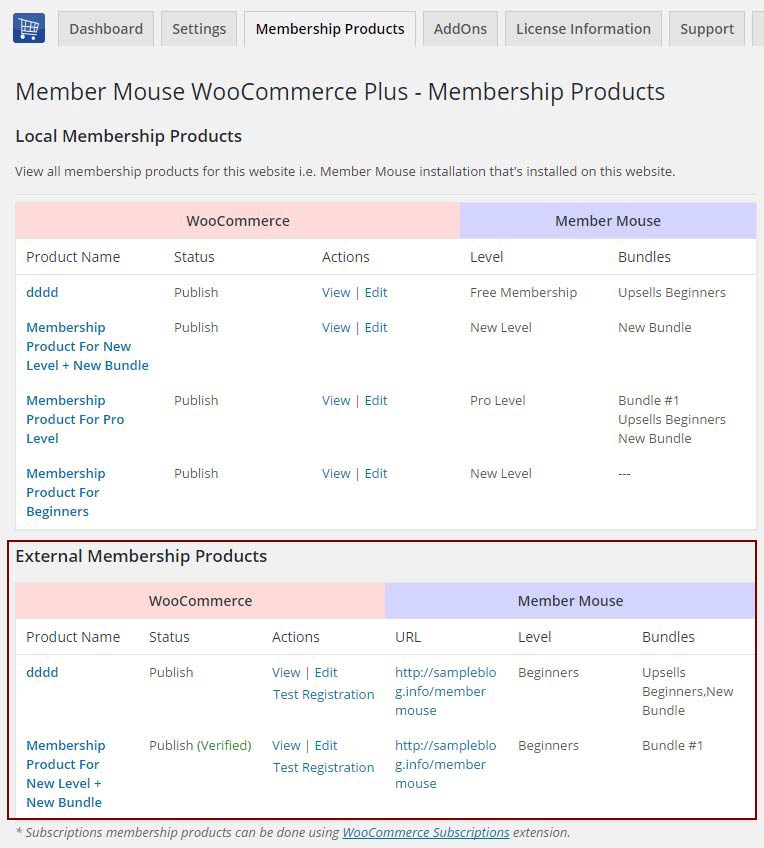
You can confirm that the membership product was indeed added by going to MemberMouse WooCommerce Plus » Membership Products tab and view all the membership products created for each membership level and bundle/s on your online store:

Testing the Registration Process
To test that the integration is working correctly and that the member is added to the relevant membership level (and bundles if defined) after purchasing the membership product through the WooCommerce platform follow the below steps:
- Copy the product’s page URL and paste it in a new browser (make sure you are not logged in to the site)
- Add the product to the cart and proceed to checkout
- Complete the purchase process using a new email address to create a new user OR an existing email to upgrade an existing user
- Now you should be redirected back to the site and see the payment / order receipt
- Go to the Manage Members tab inside MemberMouse plugin and see if a new user was created with the correct membership level (and bundles if relevant) OR if the existing member was upgraded to the new membership level and bundles
- Now make sure you have received 2 emails:
» Email with the membership details – this email is sent via MemberMouse WooCommerce Plus plugin and can be modified in the plugin’s settings under the Settings tab
» Email with the order receipt – this email is sent via WooCommerce with all the details of the purchase
Experiencing one of these problems?
- The member was not added to the membership level and bundles
- The email was sent, but the login details are missing
Please make sure you are using the latest version of MemberMouse WooCommerce Plus.
If you are, please open a support ticket and our support team will get back to you shortly.