In this article we go over how to configure the MemberMouse WooCommerce Plus – External Membership Sites Add-Ons Bundle.
After you have activated both the External Membership Sites and the Remote Access Add-Ons as explained in this article, you need to allow both add-ons to communicate with one another.
To do that, please follow the below steps:
Steps on Your MemberMouse Membership Site
- Login to your MemberMouse membership site and go to: MM Extensions menu » MemberMouse WooCommerce Plus Remote Access » Membership Levels Products tab
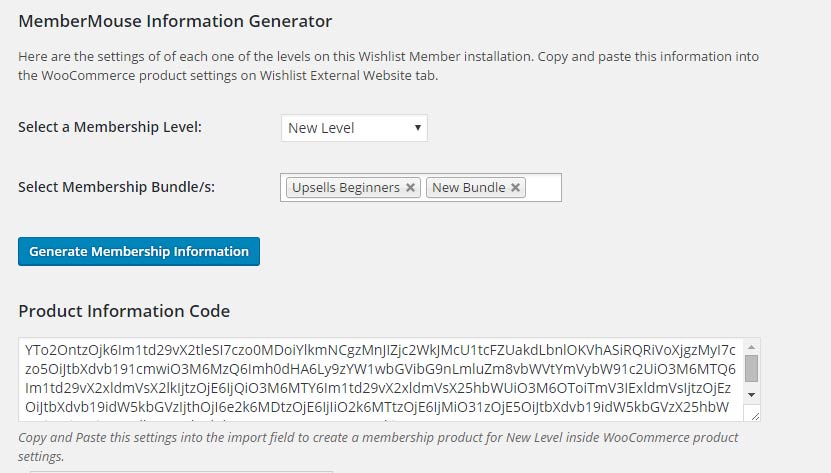
- Scroll down to the “MemberMouse Information Generator” settings and:
» Choose the relevant membership level
» Choose the bundle/s (if relevant)
» Generate the membership product information code - Copy the product information code

Steps on Your WooCommerce Store
- Login to your WooCommerce store and go to the WordPress menu » Products » Add Product
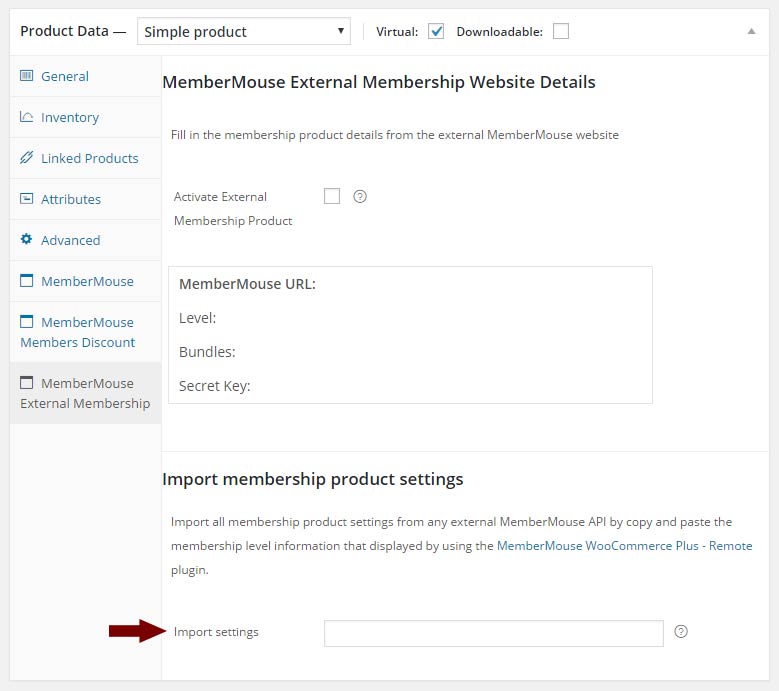
- Scroll down to the WooCommerce Product Data Meta Box » MemberMouse External Membership tab
- Paste the code in the “Import Membership Product Settings” field and publish the product as seen in the below screenshot:

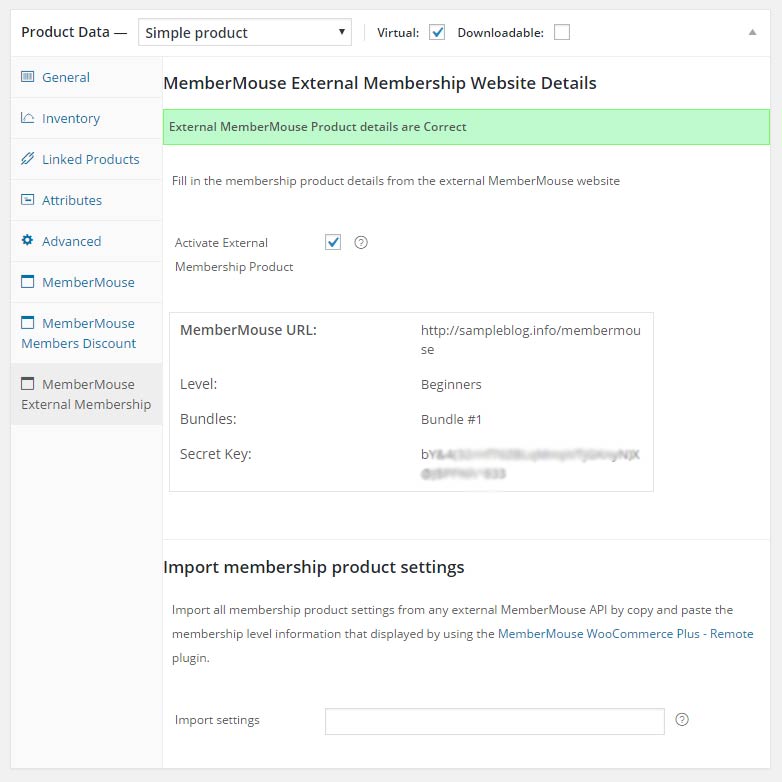
Import Membership Product Settings Field - That’s it! MemberMouse membership site’s URL, Level, bundle/s and secret key have been added automatically as you can see in the below screenshot:

External Membership Products Import Success Message
Your product is now integrated with your membership site, so whenever someone buys the product, he will be automatically added to the correct membership level in the correct membership site (handles both new and existing members).
Testing the Registration Process
1. Checking that the membership product was added to the Membership Products Table:
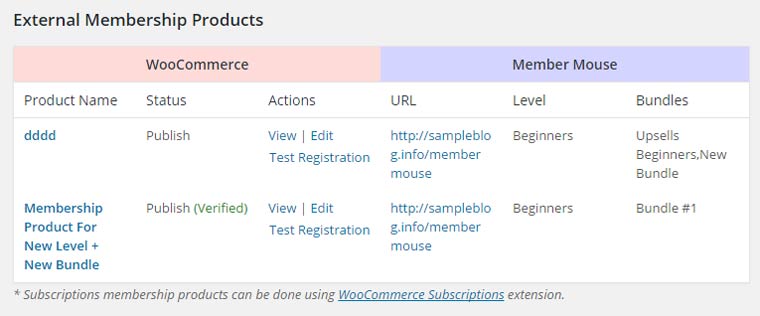
To check that the external membership product you have integrated was successfully added to the Membership Products table go to:
MM Extensions menu » MemberMouse WooCommerce Plus » Membership Products tab » External Membership Products as seen in the below screenshot:

2. Testing the registration process
To test that the MemberMouse WooCommerce integration is working correctly follow the below steps:
- Go to MM Extensions menu » MemberMouse WooCommerce Plus » Membership Products tab
- Scroll down to the External Membership Products table » Choose the relevant membership product » click on the Test Registration link. You will see the following message:

- Now go to the MemberMouse membership site » MemberMouse » Manage Members & check that a new test member was added:

This means that the integration is working seamlessly and that your WooCommerce website and your MemberMouse membership site are fully integrated.
Now, whenever a customer will purchase that WooCommerce product through your WooCommerce store he will be automatically registered (or upgraded) and added to the relevant membership level and bundles (if relevant) on your MemberMouse membership site.