In this article we go over how to configure Wishlist Member WooCommerce Plus.
Configuring Wishlist Member WooCommerce Plus is done through the Settings and the Membership Products tab. Please follow the steps below:
Defining the General Settings (Settings Tab)
After you activate Wishlist Member WooCommerce Plus license, all the settings will automatically
update in the Settings tab.
You can leave them as is or modify them according to your needs.
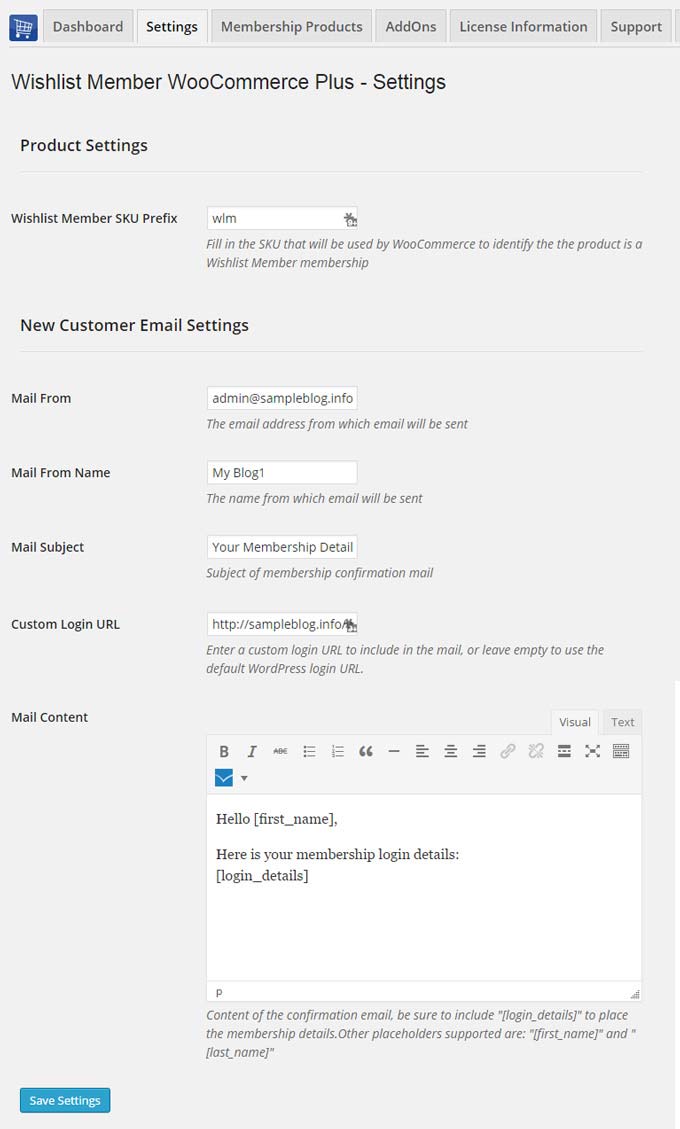
These are the settings you will find in the Settings tab:
Product Settings:
- Wishlist Member SKU Prefix – The prefix will be automatically added to new membership products you create in the Membership Products tab
New Customer Email Settings:
- Mail From – The email address from which emails will be sent
- Mail From Name – The name from which emails will be sent
- Mail Subject – The subject of the membership confirmation email
- Custom Login URL – The custom URL that will appear in the email sent
- Mail Content – The content of the confirmation email
Adding Membership Products (Membership Products Tab)
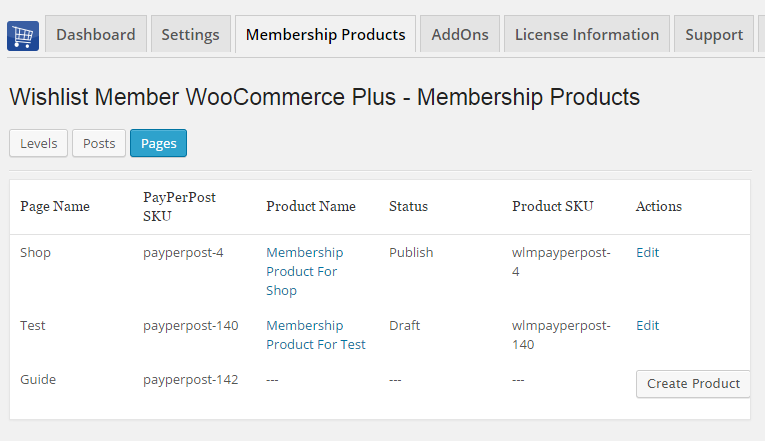
You can easily create new membership products by going to the Membership Products tab under Local Membership Products.
The meaning of “local membership products” is that your WooCommerce store and Wishlist Member membership site are are located in the exact same WordPress installation.
The process of adding a local membership product:
- To create a new product and assign it to any membership level or pay-per-post first choose the type of protection: Levels / Posts / Pages

- Choose the membership level / post / page and click on the “Create Product” button to automatically generate a new product as a draft
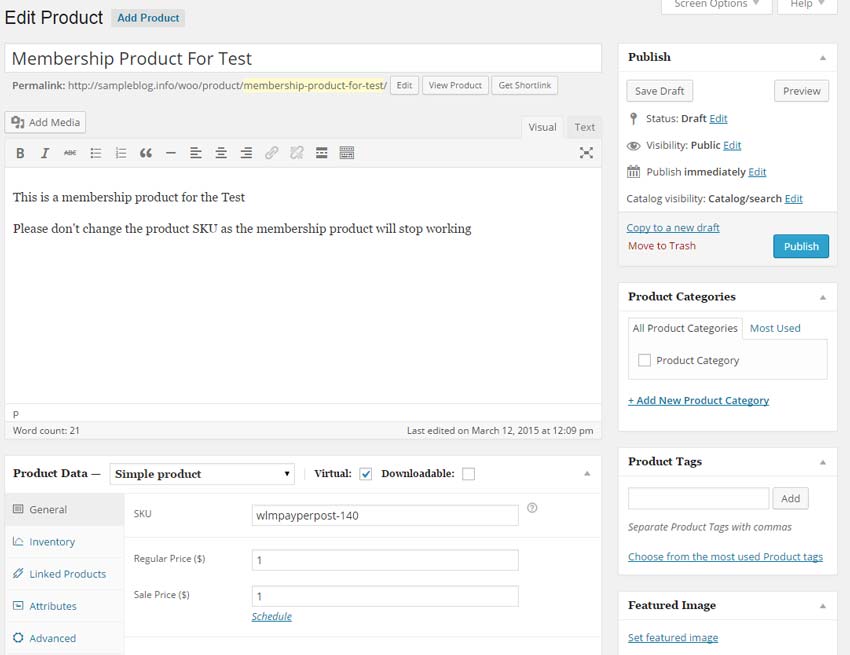
- Now click on the “Edit” link. By clicking Edit you will be redirected to edit the product as seen below:

- You can see that all the details, including the SKU, were pre-filled in the WooCommerce Product Data Meta box
- Just modify the product’s price, edit its details and publish your product
- Now every time someone buys that product he will be automatically assigned with the membership level or pay-per-post the product was created for.By going back to Wishlist Member WooCommerce Plus > Membership Products tab you can view all the membership products created for each membership level and pay-per-post on your online store.
